Image Optimisation for SEO involves the optimisation of images as much for the benefit of the landing page they’re shown under as for the benefit of being discovered through image search. It also includes optimisations which could lead to your image being featured within the Image Pack part of Google’s SERP Features.
Why is Image Optimisation Important for SEO?
Hardly anyone can argue with the fact that images facilitate our ability to assimilate information, but images can also provide a better feel for your products or services as well as build trust in your website and brand. For instance, you are very much encouraged to present data in graphical formats like a diagram as opposed to plain text, as it helps your users understand it more easily, keeping them engaged. Some other applications of images could be showcasing your product or giving a feel for the services you provide. Images of team members of your company can create credibility in your brand.
There are a number of benefits associated with a proper use of imagery.
If your images are indeed engaging and add value to your website, this translates into better user engagement on your website, leading them to spend more time on it and being less inclined to go back to search results to look for a different option. In terms, this leads to longer Dwell Time which positively impacts SEO.
Optimised Images that load lightning-fast lead to an enhanced UX. Image Optimisation for SEO addresses the issues caused by oversized images slowing down the loading of the page.
Image Optimisation involves adding ALT Text to images which makes it easier as much for search engines as for visually impaired users to understand the contents of an image. It’s also displayed by search engines when an image can’t be rendered.
Image Uniqueness and Originality
When using images, you will want them to add value to your site. If you fill your website with stock imagery, you’ll look unoriginal or in other words, like thousands of other websites that don’t stand out. While you may have your stock images perfectly edited and optimised, it won’t have the same impact or potential SEO benefits as an original, high-quality image. The more original pictures you have, the better the experience for the user and the better your odds are of ranking on relevant searches. The reason behind this is that original imagery sends out good E-E-A-T signals to search engines (Google) about the credibility of your site.
On the other hand, if you’re using images from around the web or from stock photography websites, you’re running into a number of issues straight from the beginning. Firstly, your website will look uninspiring as these images could be potentially found on other websites from your niche as well as outside of it. Secondly, you will have to provide appropriate credit to their authors which can be a rather time-consuming endeavour, not to mention it would chunk out the authenticity of your website. Lastly, a case especially relevant for photographs (but also for illustrations), unaltered stock imagery shows a lack of commitment to the vision behind your brand.
Particularly relevant to illustrated images, when you create original content you can earn backlinks from other relevant websites that will want to use it within their own content. In fact, there is an entire link-building strategy focused on this, with examples like infographics, graphs, mind maps and photographs that are embedded into other websites, linking back to the original source.
Using Unsplash for Creative Commons Photographs
If, however, you are limited in terms of budget and must go with stock imagery, I could recommend Unsplash.com as one of the world’s largest resources for photographs under Creative Commons. It goes without saying that you should use images that are highly relevant to the topic you’re discussing and align with your niche.
Put the imagery of your site in the context of what you already know about SEO and Content Marketing. When you’re trying to claim your spot in the organic rankings with your written piece, simply copying it from another source would be the last thing that you would want to do. So why would you consider this approach for a part of your website that could add value rather than subtract it.
When Not To Use Images
An image is worth a thousand words, however, don’t take it too far by using images to add more text. It’s just a bad user experience, since not only can the text get pixelated and distorted in terms of size, but it also changes the experience of interaction with text, limiting its ability to be copied to clipboard and shared.
Similarly, do not use images where you can use code, especially for navigation and interaction elements, as these can lead to really odd user experiences, not to mention slower page loading speeds. The use of text in images that feature diagrams is acceptable. However, it becomes up to you to nail the size and font of the text to match the one that is used on the page. Otherwise, the readability of the page suffers.
Naming and Describing Images
Firstly, in the context of SEO, image optimisation involves finding a number of code elements that help describe them to search engines, including the image’s File Name, Image Title and ALT Tag. The image File Name and Image Title are both placeholders for the Title, while the ALT Text is meant to describe the image to search engines or visually impaired users.
It is thus of paramount importance to write these according to their intended purposes, making them descriptive enough for search engines and users to understand what the image is about. The appropriate use of the Title and ALT Tags can facilitate both your organic rankings of the landing page the image is shown under as well as the organic rankings in image searches.
The recommended length for Image Title and File Name are a few words long and the ALT Text must be no longer than 125 characters. In the case of an image that requires a longer explanation of its content, the use of a LONGDESC attribute is required, which allows for the accommodation of a description which is on the same page or a separate resource.
Another important note is to think about the image file structure. In particular, Google has updated its image guidelines to include one major update which revealed that they use the File Path to rank images. So the File Path is an actual ranking factor. So for instance, if you’re an e-commerce brand with multiple products, instead of placing all your product images into a generic folder I would recommend structuring your subfolders to more category-related topics.
Editing the Image Title And ALT tag For Images In RankMath
In order to edit the Image Title and ALT tag navigate to the “Media” section of WordPress and click “Library”, then select you want to edit the image metadata for and simply edit the Image Title and ALT tag from within the corresponding fields. You will also be presented with options for “LONGDESC” if needed as well as caption, which can be edited either from here or from the Landing Page the Image is on, directly.
RankMath also provides the option to exclude any image from sitemaps below.
Another general recommendation is to write your titles in lowercase, as all images will create automatic URLs that should use lowercase letter as we describe in the URL Optimisation section.

Optimisation of Image Format
If the website at hand has many images, chances are image optimisation is pretty high on the technical optimisation list. There are 2 types of images, illustrated and photographic, each type having its own dedicated format. Thus the first step would be ensuring the illustrated images are presented in the PNG format, also known as lossless format and the photographic images in JPEG, also known as lossy format. This ensures the images are displayed with all their properties and in all the richness they were envisioned.
A good example of the benefits of the PNG format is that it supports a transparent background. So illustrations with partially transparent background could fit right into the background of your page, which makes for a huge difference if your background page colour is any other than plain white.
There are also short motion pictures, normally taking the GIF format. These images however are significantly heavier in size, which is important to remember when thinking about page loading speeds. Similarly, with more recent developments, the web is seeing SVG images used as code increasingly more often. One of their main benefits is that they’re infinitely scalable and can become easily compatible across devices, browsers and screen resolutions. This has a positive influence over page loading speeds and contributes towards uncovering additional opportunities for micro-interactions, which can serve as a competitive advantage. Not to mention the infinitely scalable vector-based graphics are somewhat future-proof as the new screens become able to accommodate increasingly more pixels per inch (cm).
This section wouldn’t be full without mentioning the new generation image formats like WebP. WebP is a modern image format that provides superior lossless and lossy compression for images on the web. Using WebP, webmasters and web developers can create smaller, richer images that make the web faster. WebP lossless images are 26% smaller in size compared to PNGs. WebP lossy images are 25-34% smaller than comparable JPEG images. It might be worth mentioning that WebP hasn’t been widely adopted and it is ultimately up to SEO Managers to decide if the extra work of converting to this format is worth it.
Optimisation of Image Size
As the title would suggest, the optimisation of image size can come at the cost of image quality but if done right it doesn’t have to. First, it’s worth noting that if you understand the maximum width of screens for which your website was built it will go a long way in setting the appropriate dimensions for your image widths. This will ensure that no matter the device, your images will not be larger than necessary and therefore won’t increase the page’s overall loading time by more than it is necessary. Plus, it allows the browsers to size the image before the CSS is loaded.
Secondly, if you want to push your image optimisation to its limits, you will have to use new-generation file formats like WebP. These formats allow for greater compression without losing image quality.
Optimising Images for Page Loading Speeds using ShortPixel
If you’re using WordPress, one great plugin that encompasses all these features and will optimise all your images for you in a few clicks is ShortPixel.
One of the reasons to use the Shortpixel plugin over some of its competitors is its ease of set-up, use and a straightforward user interface. Just find and install the Shortpixel plugin from your plugin section in WordPress and you’re ready to optimise your images. Please mind that this is paid plugin.
- Go to your WordPress admin area and click on Plugins > Add New.
- Find the plugin by typing “shortpixel” in the search field.
- Click on Install Now on the ShortPixel Image Optimizer.
- Once installed, the button will change to Activate.
- Click “Activate”
Setting up the Shortpixel Plugin
To enable the optimisation process, you must configure the plugin with the API Key associated with your account. Log in to your ShortPixel account, go to the API Key menu and copy your API Key. Then, navigate to the plugin settings (Settings > ShortPixel), paste the copied API Key and press the ‘Validate‘ button.
Now, on your WordPress Dashboard, go to Settings > ShortPixel and review all the settings to ensure everything is configured according to your preferences.
You should use Lossy compression, as this is the recommended method for optimising your images. It offers the best compression rate, producing results that look identical to the original to the human eye. You should also apply compression to image thumbnails, but bear in mind that thumbnails count towards your total allowed quota, meaning they will use credits just like regular images.
I would also recommend disabling the ‘Smart cropping’ of images, as it can sometimes produce results that are difficult to control. Always create a backup of your original images so you can restore them in case the optimisation results are not as expected. Keep the ‘Remove EXIF tag’ option enabled, but disable ‘Resize large images’ to ensure that larger images do not lose quality when optimised.
The Shortpixel Settings Under Advanced Tab
You will find an additional set of settings in the advanced tab. I would recommend creating WebP versions of the images as this is a preferred new generation format by major search engines, namely – Google. We’ll keep the Deliver the next generation versions of the images in the front-end turned off as it’s harder to anticipate how this will behave on the website.
Make sure you tick the Automatically optimize images after they are uploaded option, along with optimise pdf documents and retina images. Do not convert PNG images to JPEG as PNG is a preferred image file for illustrations. Tick the adjust your images’ colours for computer and mobile displays. Press Save Changes and you’re ready to go.
Considering Image Resolution
The topic of Image Resolution and the concept of SEO don’t go very well hand in hand. The reason for this is that most SEO Managers over the years have provided recommendations about image resolutions and namely pixel density to be around 72 pixels per inch because at the time this was the maximum pixel density on most screens. Thus there was little point to encode images with the detail that would be impossible to observe on most screens.
However, just like in the world of software, significant progress was made in the world of hardware, pushing those numbers significantly up. At present time a modern screen from a Mac is likely to support as high a pixel density as 218 PPI, a number which can go even higher on the new iPhones.
The lesson here is not to optimise for technology that is destined to change or in this specific case start taking the new 218 PPI resolution as the new bare minimum when optimising your images.
Using Responsive Images
At some point in time, due to the overtaking of mobile devices as the preferred method for users to browse the web, Search Engines and Google in particular have started to use something called “mobile-first indexing” which crawls and ranks pages based on how they display on mobile devices. This means that optimising your site for mobile devices has never been more important and that includes the Image Optimisation.
Considering the mobile screens are significantly smaller than desktop screens, it’s crucial to choose a WordPress Theme that is Responsive to enable images to seamlessly adapt to your responsive designs. As a result this means images will be displayed in the appropriate size for the device they’re being viewed on.
Using A WordPress Responsive Design Theme
Using a Responsive Design Theme on WordPress is enough for your images to show correctly on all devices, but you will still need to go though all the other mentioned optimisations.
Benefiting From Lazy Loading
Lazy loading is a page loading technique that defers the loading of images that are further down the page or in other words outside the user’s visible screen. These images are only loaded when the users scroll down the page and thus this process accelerates the initial page loading speeds which has an impact on organic rankings. Implementing lazy loading is useful for most pages that contain images but especially for ones that feature a large number of images.
Lazy Loading in WordPress
The good news is that if you’re using a WordPress 5.5 or a later version you won’t need to add Lazy Loading functionality to your website manually or through a WordPress plugin as this is enabled by default.
Add Images To The Sitemap
Whether you’re adding your images to your sitemap or creating a new sitemap for images, you want images somewhere in your sitemaps. Having your images in a sitemap greatly increases the chances of search engines crawling and indexing your images.
Adding Images to Sitemaps in WordPress
If you’re using WordPress, RankMath offers a sitemap solution in their plugin. In a few words RankMath creates a sitemap index which will include a sitemap just for images.
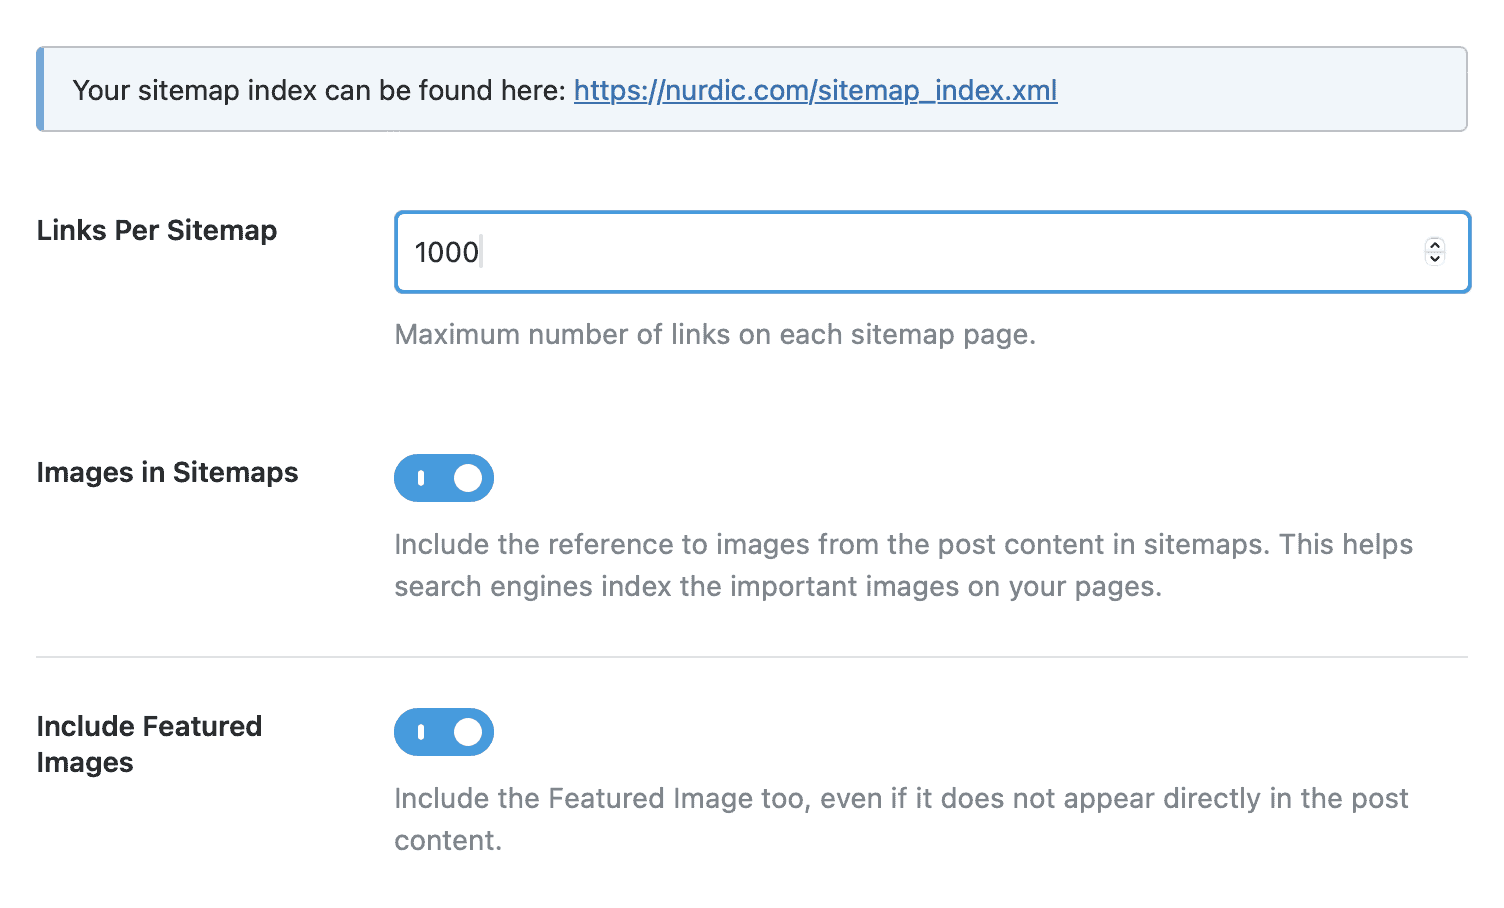
To ensure that your image sitemap is turned on you must navigate to RankMath “Sitemap Settings” and then find the “General” tab.
This tab features two controls, one for enabling image sitemaps and the other for including “Featured Images” (which don’t necessarily need to be present on the actual landing page, in the sitemap.
Attributing Creative Commons To Images
Sourcing images can prove to be quite difficult at times, but even more difficult is giving them appropriate attribution. When images are taken from other sources, it is important to reference the rightful owners ensuring everyone is correctly credited for their work. This also prevents the spread of stolen or copied images to other domains. In most cases, if you’re using an image, you’re legally required to attribute it, and failing to do so may lead to legal proceedings. Luckily, image attribution is quite straightforward:
The Creative Commons (CC) framework defines attribution as giving “appropriate credit” through a simple and flexible method that accounts for the requirements of the various CC licenses. To make sure images are correctly attributed, include the following details and make sure they are clearly displayed by the relevant image (ideally directly underneath):
- Title: The title of the image.
- Author: The name of the creator.
- Source: The URL where the image is hosted.
- License: The type of Creative Commons license it is available under, including a link to the relevant license.

Here are some helpful hints for correctly attributing a Creative Commons image:
- Make sure you do the work to attribute images per the TASL method, including sourcing missing information if necessary.
- Where there are multiple creators, list each one of them.
- Only substitute a username or handle in cases where the creator’s full name is not available.
- If there’s any doubt as to how the creator(s) should be credited, get in contact with the copyright owner.
- Make sure the attribution is fully visible.
You might come across Creative Commons images that have no clear link to their creator or license type. In this case, publishing an image without identifying the creator immediately breaches the terms of a Creative Commons license. The only exception to the rule is if the image is attributed to a CC0 license. If there is no clear link to the creator or license type of an image – just don’t use it. Outside of Creative Commons, images should be attributed to their creator as per the license agreement under which they were procured.
Attribution can take a variety of forms, and it’s standard practice for it to be negotiated into any licensing agreement as part of the work’s usage terms. Some photographers will charge higher fees for publication of their work without attendant attribution – this makes sense when you consider that attribution is a form of advertising for the photographer.
Using Images for Social Media
Images are also displayed on posts shared on Social Media. Each Social Media platform will have its own requirements for dimensions, some allowing larger images than others. This is where the use of a Protocol called Open Graph comes in. While the Open Graph protocol won’t work with all the social media platforms out there, it is by far the most commonly used one.
Using OpenGraph in WordPress through RankMath
All you need to do to use the OpenGraph protocol to your images in WordPress using RankMath is to go to the Page you’re trying to set the OpenGraph image for and navigate to the “RankMath” icon in the top right corner than open up the “Social” panel.
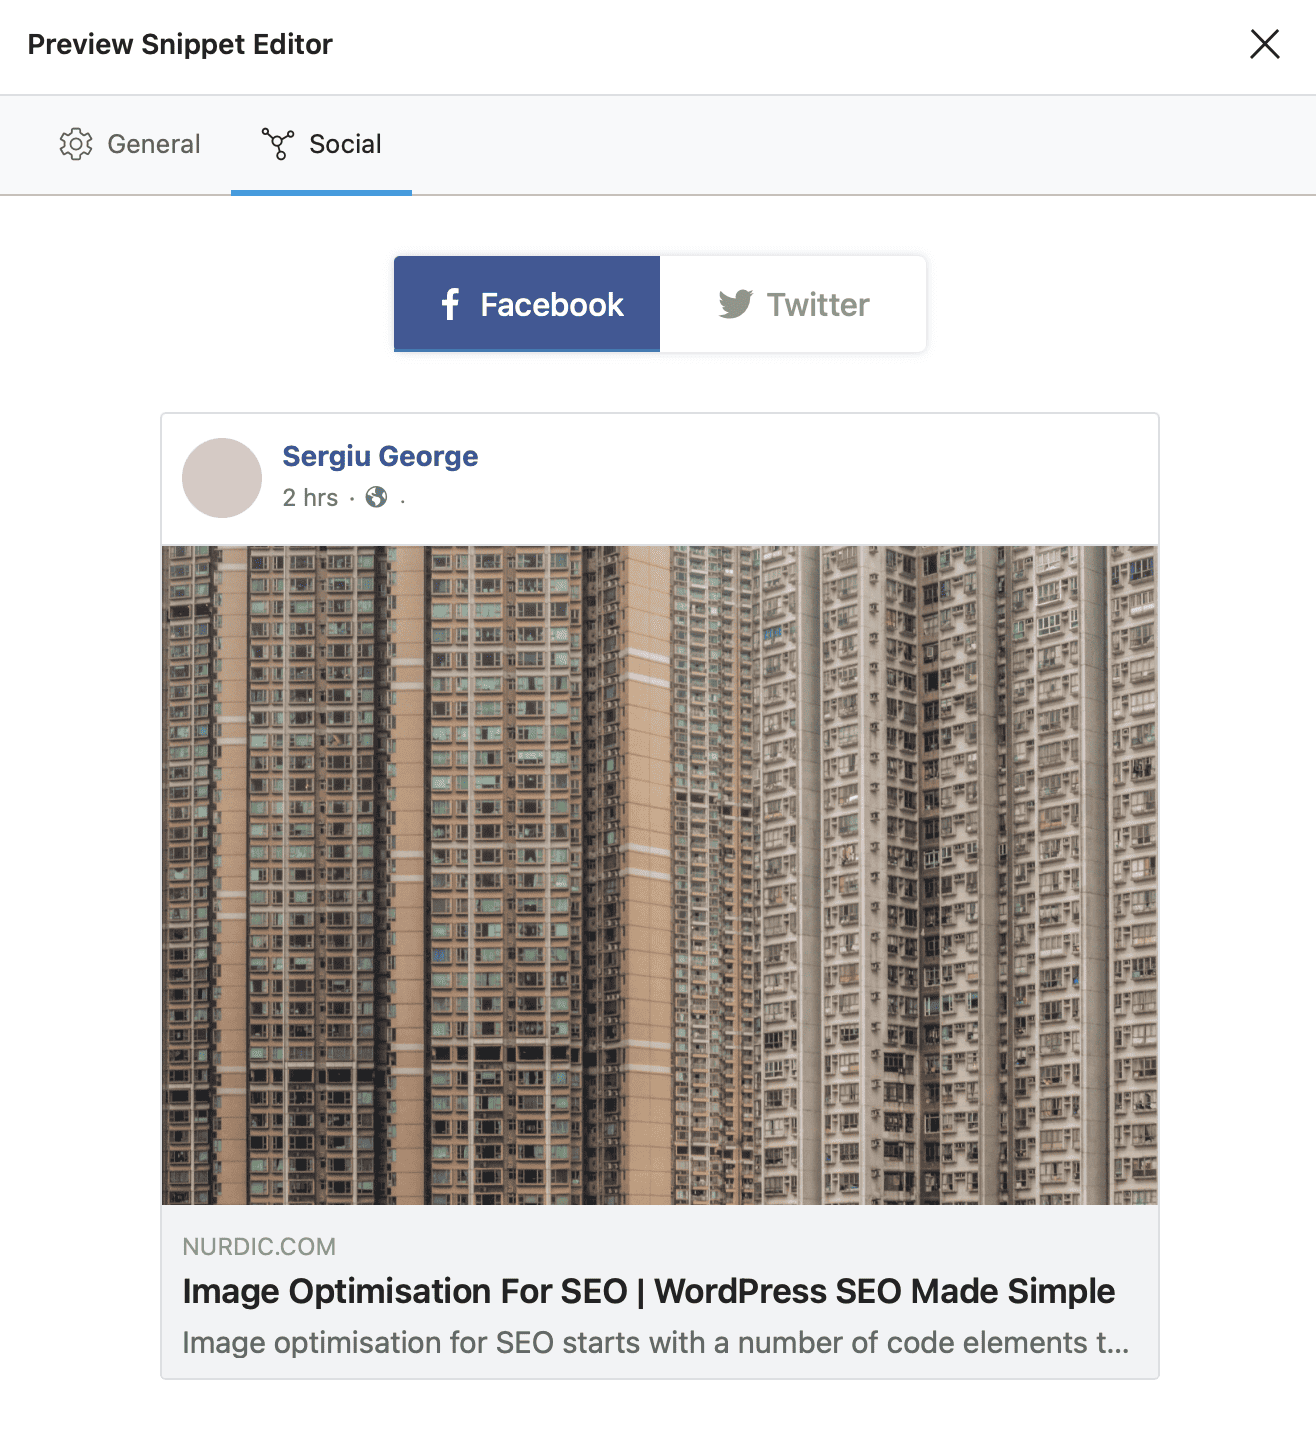
Once you open it, click “Edit Snipper” which will open the “Preview Snippet Editor” for your Open Graph Image. You can edit the title and description, along with the image itself for both Facebook and Twitter using this window.
As you edit the titles and descriptions for these platforms, you’ll want to fit into existing character limits in order for your text to be fully visible on the social media platforms in question.
Identifying Issues with Images
So we’ve cleared how to upload images with appropriate File Names, how to change the Image Titles and ALT text, as well as how to make effective use of Image File Types and accelerate the loading of images. However, if you’re working on a website that has been around for some time, chances are you will have to optimise existing images, so this section will detail exactly how to spot errors and optimisation opportunities for your images.
Some of things you will have to look for are Broken Image Links, Missing ALT text, Improperly-sized Images.
1. Fixing Broken Image Links
One of the most common issues with images is that they simply can’t be located due to a URL change or whatever other reason. This affects your SEO efforts in several ways:
- Broken image links could signal that your site is not well maintained which can potentially result in lower rankings.
- Broken Image links result in poor User Experience (UX), as visitors will be inclined to view your website as less reliable which leads to higher Bounce Rates and overal reduced User Engagement
- Broken Image links lead to Search Engines not being able to index your images, which means they won’t be accessible through Image Search.
2. Editing Missing ALT Text
As we’ve explored above ALT text helps Search Engines and visually-impaired users determine what the image is about and does reflect on Organic Search Rankings. Luckily, you do not need to look at every image at your site to find those that are missing ALT tags, you may simply run a crawl in an SEO crawler available on the market and it will give you both broken images links as well as the list of images with missing ALT text.
Spotting Broken Images, Missing ALT text using Crawlers
The most comprehensive way of assessing your images against a set of optimisation criteria that also includes broken image links and missing ALT text is to run a website crawl through a crawler like Sitebulb or Screaming Frog which will automatically surface these issues.
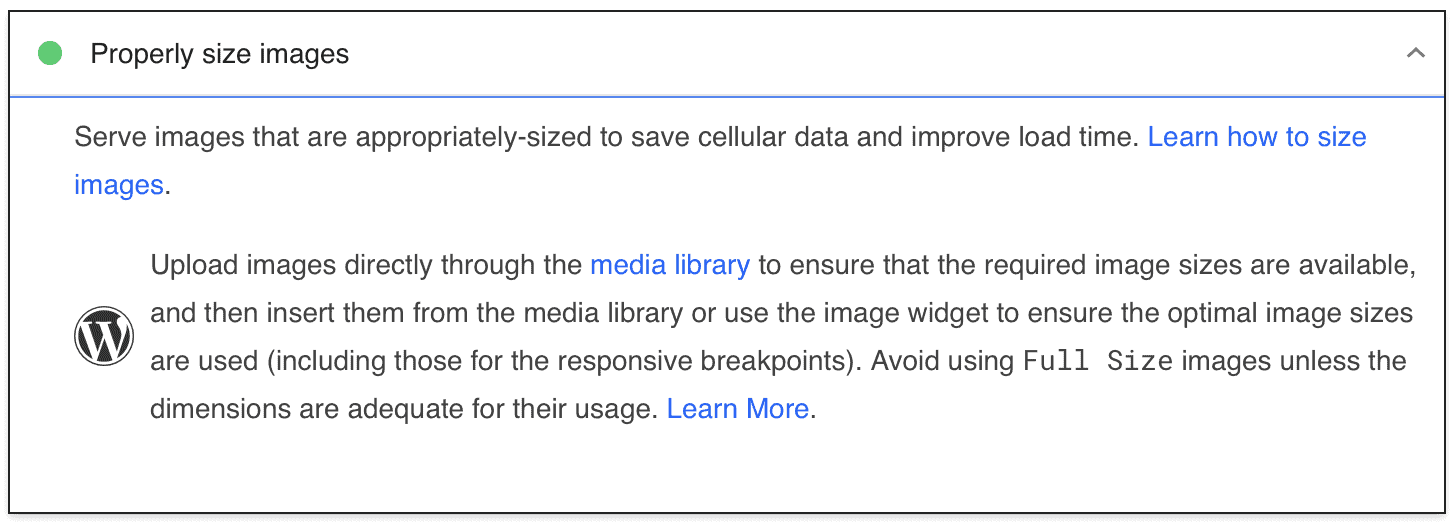
3. Finding Improperly-sized Images
Similarly, as we’ve explained above most Responsive Design Templates in WordPress will have a maximum width for the area your images will normally be nested within. Thus there is no point in having images of a wider width that established by the WordPress Theme. In fact, having a wider width for images than the maximum width allowed by the WordPress Theme will drag your Page Loading Speeds up, decreasing the overall Performance of the Landing Page.
So, naturally, if you’re already working with a website that has a lot of images what you will want to do is to spot all those opportunities for optimisation of Image Dimensions.
Finding Improperly-sized Images using Google PageSpeed Insights
The easiest way to find improperly sized images is to visit Google Pagespeed Insights and enter the URL for testing. The downside of this tool is that you won’t be able to scan the entire website in one go, but only one Landing Page at a time.
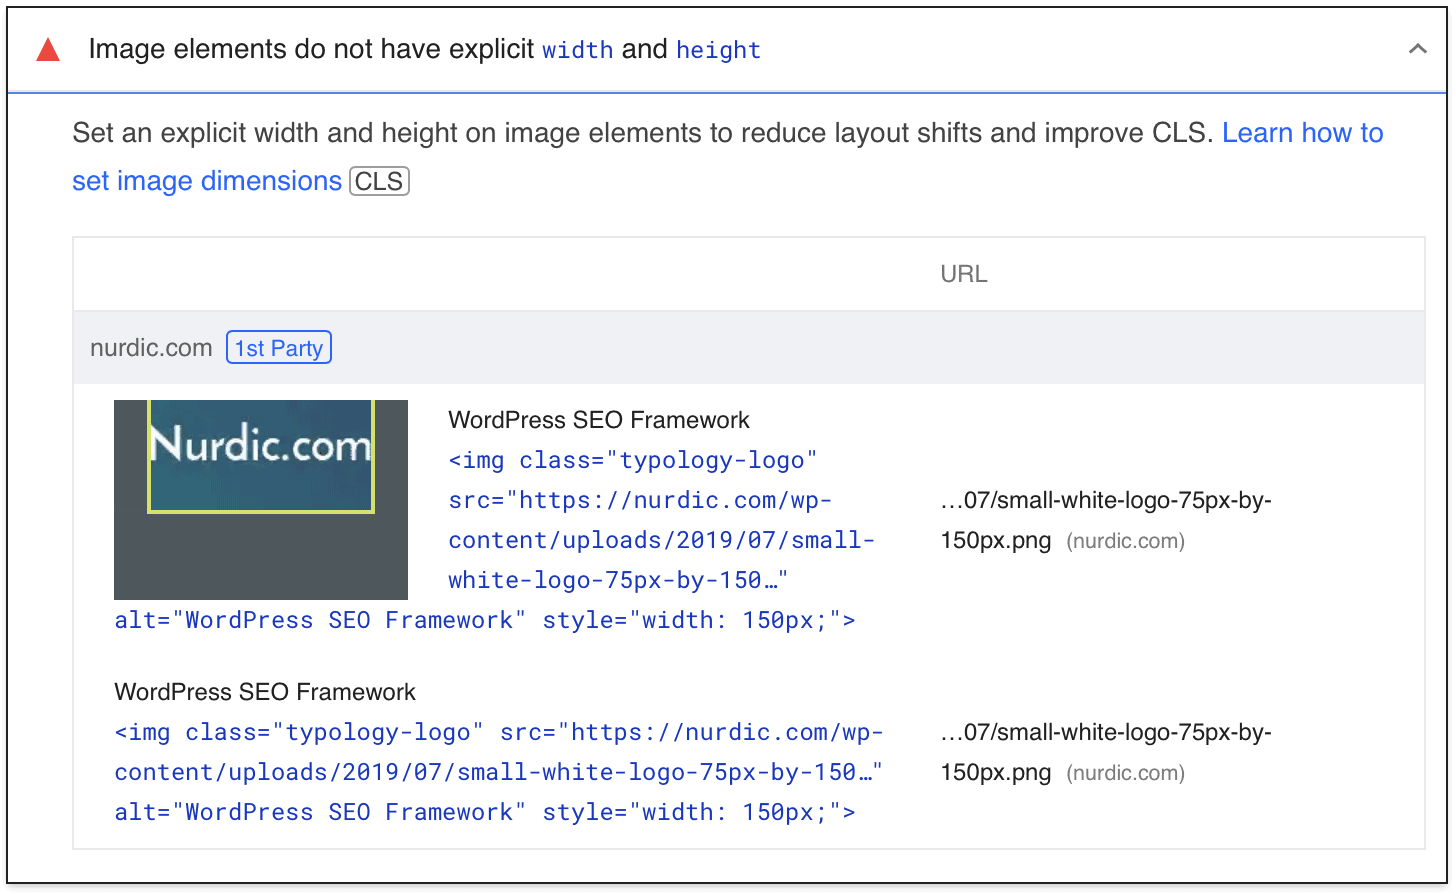
When scrolling slightly further down in the report, you can find out if any of your images don’t have explicit widths or heights. This means the width and height for these images aren’t specified in the HTML code for the website. By clicking on this issue I can see a thumbnail of the affected image and its URL. This is rather helpful because all you need to do now is make sure to set the width and height of these images. This will ensure that your page loads efficiently on different devices, which will lead to a more positive UX, and, ultimately, better rankings.